I made the decision to switch email marketing platforms from MailChimp to ConvertKit a little over 2 months ago, and I haven’t looked back.
I’m a fan of ConvertKit because it allows me to organize my list per subscriber with tags and segments, which has allowed me to understand my audience better. I also love how easy it is to set up automated emails and content upgrades using their platform. (I’ll have to do an in-depth post on all of my reasons for switching soon!)
But there’s one MailChimp feature that I do miss: Their easy integration with Squarespace.
Before I made the switch, I was able to set up a form on my Squarespace site, link it to one MailChimp lists, and I was good to go.
Unfortunately, this isn’t an option with ConvertKit… yet.
However, before any Squarespace users get bummed out about this, I have good news!
There are a couple simple solutions for syncing Squarespace and ConvertKit.
And if I can implement them without any trouble, I’m certain you can, too.
Option 1 | Embed your opt-in
This option is by far the easier and less involved of the two.
ConvertKit allows you to create customized opt-in forms using their platform. Each time you create a form with ConvertKit, you’re given a snippet of code that you can add to any Code block on your Squarespace site, whether it’s on a page or in a blog post.
Here’s how to set it up.
First, login to your ConvertKit account and create a new form.
Choose the “Form” option…
...and pick a form style. The style you choose will depend on how much information you want to include. (I usually go with the third option; it’s the simplest.)
Once you’ve chosen your form style, ConvertKit allows you to customize the colors of the form by clicking on the magic wand icon.
Once you’ve implemented your brand colors, click on the Settings tab to make edits to the features of your form.
Be sure to give your form a name, write a success message (or redirect new subscribers to another page on your site), and select an email sequence if one applies. You can also set up an incentive email and Twitter cards.
Once you’ve walked through all the form options, click the Embed tab in the lefthand menu.
Choose the Raw HTML option at the top of the page, select the snippet of code below, and copy the code with the keyboard shortcut Command+C.
Next, login to your Squarespace site and open the page or blog post that you would like to add your form to.
In Edit mode, add a new code block to your page or post.
Then paste the ConvertKit code into the block (Command+V).
Click “Apply,” save the changes you’ve made, and you’re good to go!
You may see an Embedded Scripts notice in the preview on the backend of your site, but your form should appear regularly on the frontend.
Option 2 | Set up a zap on Zapier
The first option works well in most instances, unless you want to use Squarespace’s form block for opt-ins.
For example, my homepage includes 4 separate opt-ins. To cut back on the clutter of all those form fields, I used a feature included under the Advanced section in the Squarespace form block called “Lightbox Mode."
Lightbox mode replaces the form with a button, so the form opens when the button is clicked.
The only trouble is that Squarespace doesn’t currently sync up with ConvertKit on the backend. Thankfully I found a way to connect the two with Zapier.
Zapier is an app that allows you to sync different applications and automate certain business functions. While it may sound a little complicated, their user interface makes it really simple to connect different platforms by setting up “zaps,” or automations.
But before we jump into Zapier, you’ll need to setup your new form in Squarespace first.
Add the form block to your page or post and set up your form fields under the Build tab.
*Important* If your form uses the Name form field, be sure to delete that field and add a normal Text field for subscribers to enter their name.
The regular Name field includes spaces for both a first name and a last name, and the last name will add an extra column in your Google Doc and throw things off. Use the Text field instead so one name will be entered and the columns will match up when you set up your zap.
Once you have your fields set up, connect your form to Google Drive under the Storage tab.
Squarespace will ask you to enter a spreadsheet name. Go ahead and give it a name (related to your form) and it will automatically create a new spreadsheet for you.
Save the form, enter your information to test it out, and open up your new spreadsheet in Google Sheets, just to make sure everything checks out properly.
Now that you have your Squarespace form set up, you’ll need to setup a zap in Zapier to connect the form to ConvertKit.
You can do that by logging into Zapier (or creating a new account) and clicking the big orange “Make a Zap!” button at the top of the screen.
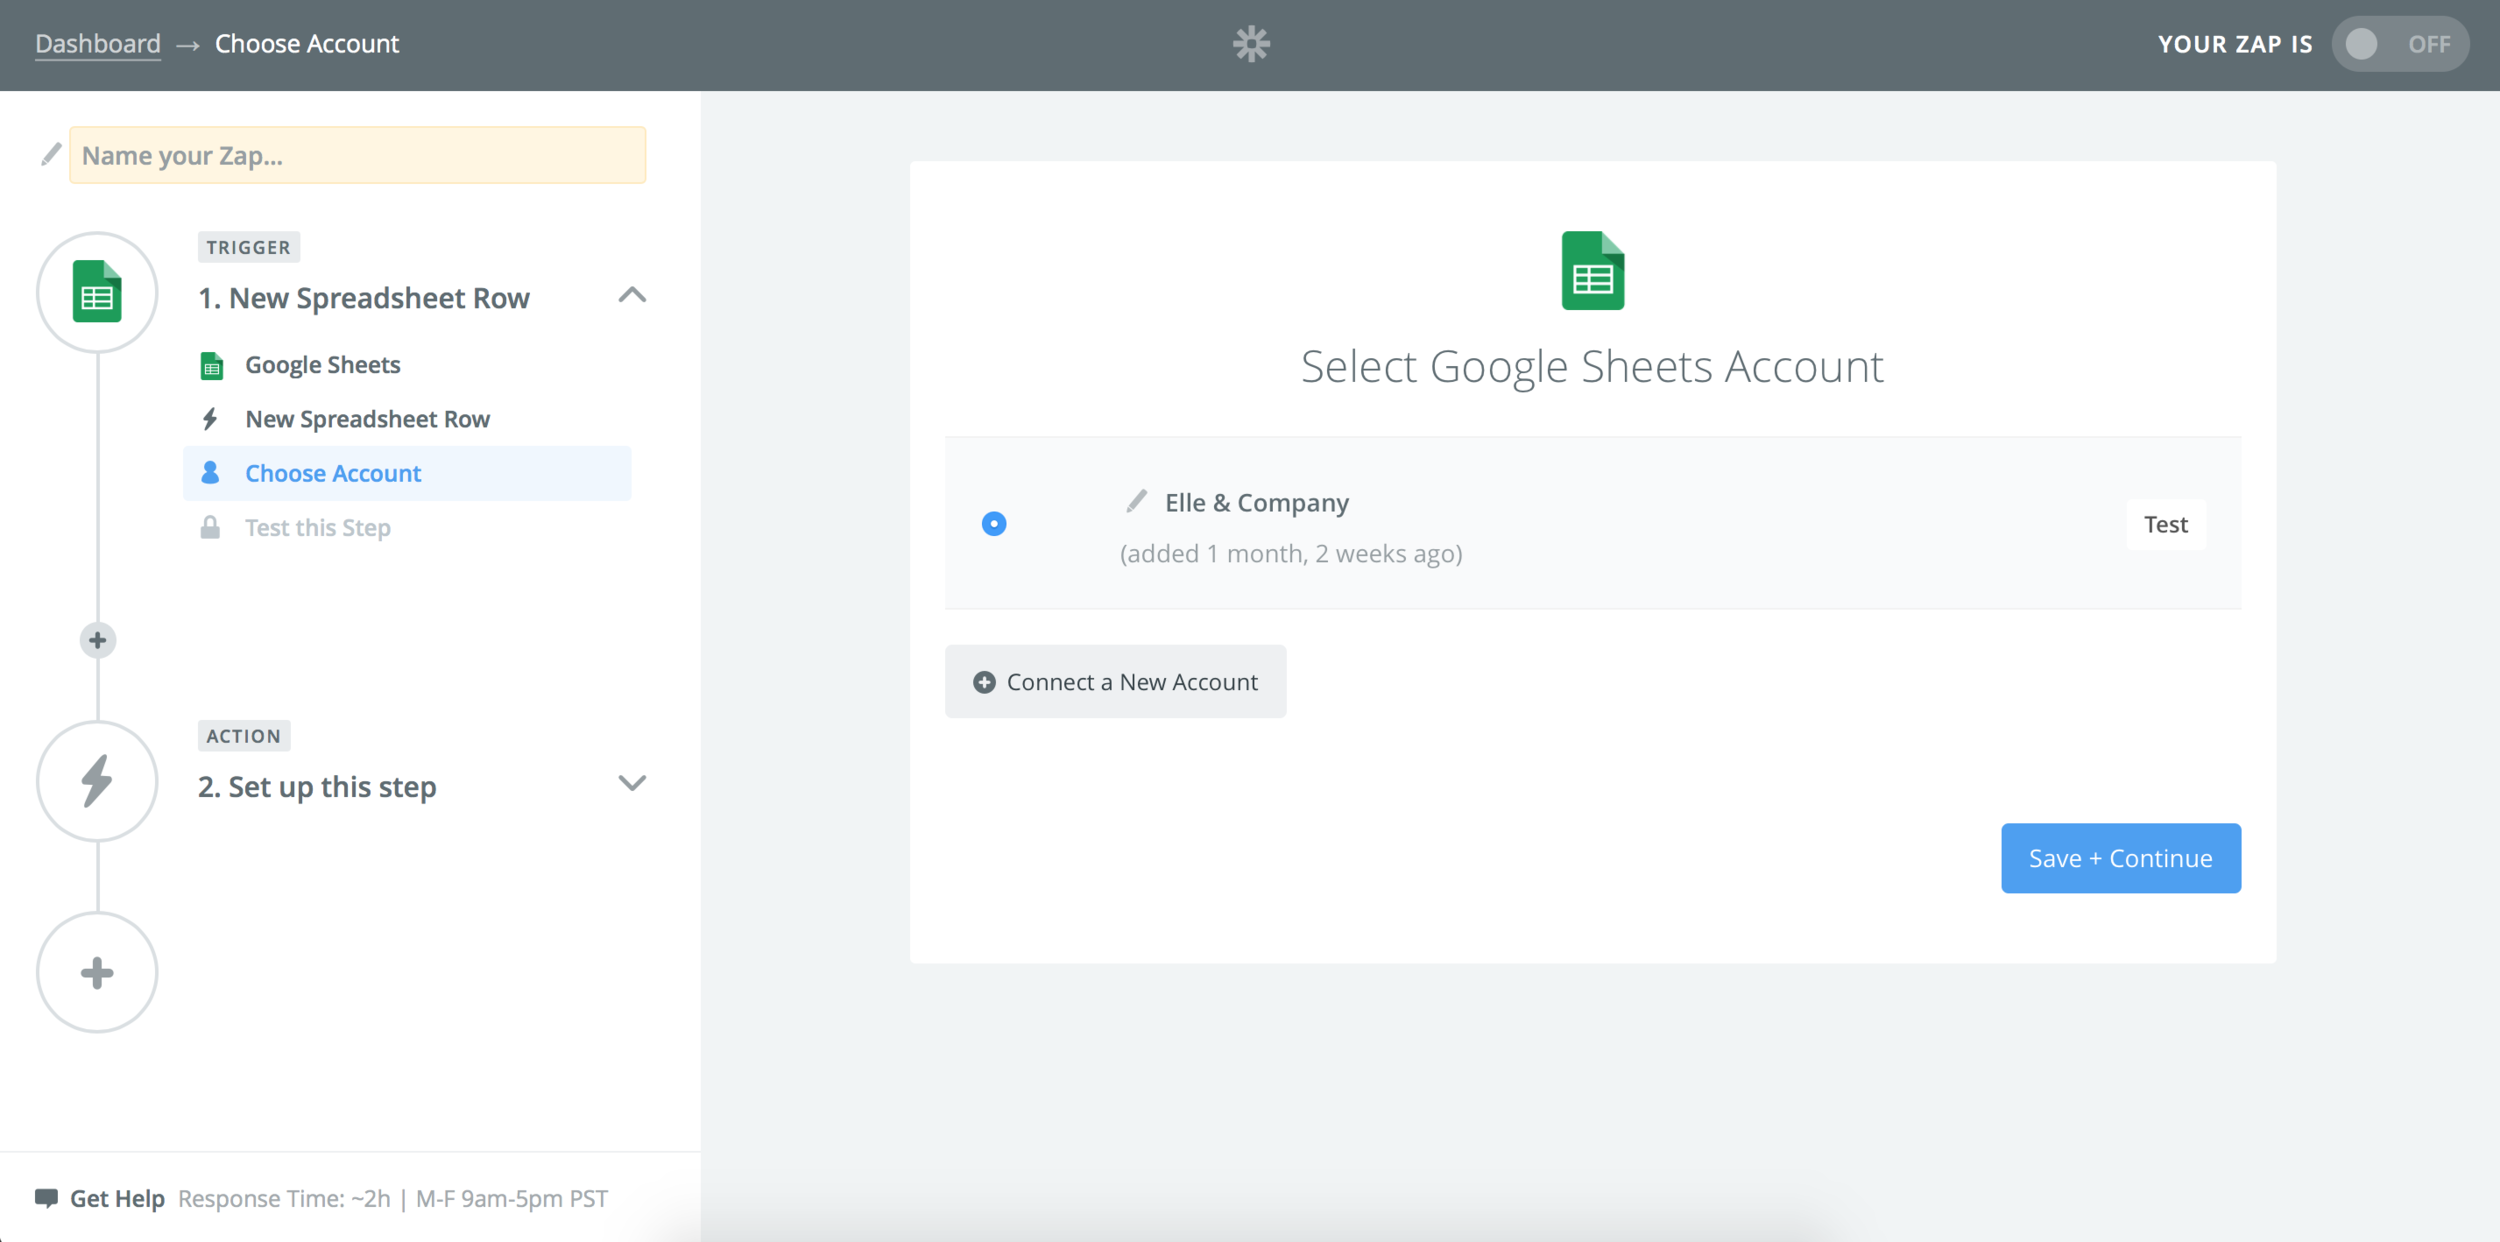
Zapier will ask you to choose a Trigger App. Choose Google Sheets.
Then choose New Spreadsheet Row…
...login to your Google account…
...and connect the new Spreadsheet you just created (you can find it by clicking the arrow beside each field).
Zapier will want to run a quick test to make sure your Google Sheet checks out okay. Go ahead and walk through those steps.
Then, choose ConvertKit as your Action App...
...check the radio button next to Add Subscriber to a Form…
...and connect to your ConvertKit account.
Once you click Save + Continue, you’ll be asked to setup your ConvertKit subscriber.
Use the buttons on the right of each field to find the form you want to connect to (I set up separate forms for each of my 4 opt-ins in ConvertKit beforehand), and link to the emailaddress and name fields on your Google Spreadsheet.
There’s also an option for your subscribers to opt-in to a course, but I chose no for that one.
Once all those fields are setup, click Continue and finish the zap!
It will automatically test it out for you and you should receive the test email in your inbox (if you have an automated sequence setup with your form).
If everything checks out okay, be sure to turn your zap on by clicking the button in the top right corner of your screen.
And there you have it!
Squarespace and ConvertKit should now be synced and good to go. Every new subscriber who opts-in through your Squarespace form will now be added into ConvertKit.
If you get a lot of traffic and the zap is running frequently, you might be forced to upgrade your Zapier plan. And while paying extra isn't so fun, an influx of subscribers is a great problem to have!
I’ve also found Zapier helpful for automating other aspects of my business, like syncing ConvertKit with Crowdcast, so it’s definitely worth looking into.
Connecting Squarespace and ConvertKit doesn’t have to be painstaking or time consuming. By embedding custom forms on your site or setting up a zap with Zapier, you can sync the two in no time!


